Selecting the right fake security camera housing is crucial for an effective and budget-friendly deterrent system. Prepare the mounting surface, strategically choose a location, securely fasten the housing, and route hidden wiring to avoid detection. Following "How to Mount Fake Security Cameras" best practices ensures optimal protection while maintaining aesthetics.
Looking to enhance your home or business security without breaking the bank? Replace your old dummy camera housing with a realistic fake security camera. This step-by-step guide will walk you through the process from start to finish, including choosing the right fake housing, preparing your mounting surface, securing the dummy camera, adjusting for realistic placement, and finalizing with hidden wiring if needed. Learn how to mount fake security cameras effectively and deter potential intruders.
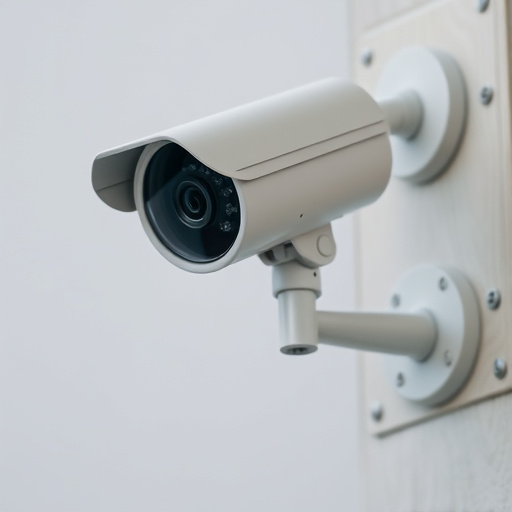
- Choose the Right Fake Camera Housing
- Prepare Your Mounting Surface
- Install the Dummy Camera Securely
- Adjust for Realistic Placement
- Finalize with Hidden Wiring (if applicable)
Choose the Right Fake Camera Housing
Choosing the right fake security camera housing is a crucial step in successfully mounting and positioning your dummy cameras. When selecting a housing, consider factors like size, design, and material to ensure it closely resembles a genuine security camera. Opt for high-quality materials that can withstand outdoor conditions if you’re installing them outdoors.
The housing should be easy to install, often featuring simple screw-on or snap-fit mechanisms. Ensure compatibility with your chosen mounting location—whether it’s a pole, wall, or ceiling—and consider additional features like weatherproofing for extended durability. With the right fake camera housing, you can create an effective deterrent without breaking the bank.
Prepare Your Mounting Surface
Before installing your new security camera dummy housing, ensuring your mounting surface is prepared is a crucial step in the process. Start by cleaning the area where the camera will be placed to remove any dust or debris that could hinder adhesion. If you’re replacing an existing housing, carefully remove the old one without damaging the wall or surface it’s attached to. Inspect the area for any signs of damage or irregularities and make repairs as necessary.
For optimal results when learning how to mount fake security cameras, consider using a stud finder to locate and mark the studs behind your mounting surface. This will provide a sturdy base for securing your camera housing, ensuring the device is less likely to be dislodged or damaged over time. With a proper mounting surface prepared, you’ll be ready to install your new dummy housing, enhancing the overall security and aesthetic of your space.
Install the Dummy Camera Securely
To install your dummy security camera properly, start by choosing a strategic location with clear sightlines. Securely attach the housing to a sturdy surface using the provided hardware or screws, ensuring it’s level and stable.
Follow the manufacturer’s instructions for best results. Use lockable connectors or brackets to prevent tampering. Once mounted, test the camera’s functionality and ensure its positioning offers the desired coverage without capturing sensitive areas or privacy breaches.
Adjust for Realistic Placement
When mounting fake security cameras, ensuring they look realistic is crucial for maintaining an effective security system illusion. To achieve this, consider factors like height and angle. Typically, real security cameras are positioned at eye level or slightly above, so replicating this placement will help create a convincing facade. You can use tripods or wall mounts to adjust the height and aim of the dummy camera, making it appear as though a genuine surveillance device is installed.
Additionally, vary the angles to mimic natural mounting practices. Real cameras often lean slightly to one side or the other for optimal viewing. This subtle adjustment can make your fake security camera setup look more authentic. Remember, the key is consistency and attention to detail when How to Mount Fake Security Cameras; this will help deter would-be intruders and maintain the overall integrity of your home or business’s security measures.
Finalize with Hidden Wiring (if applicable)
After securely mounting your fake security camera dummy housing, it’s time to finalize the setup with hidden wiring (if applicable). This step is crucial for ensuring a seamless and realistic appearance. Carefully plan the routing of cables to avoid visible traces that could give away the deception. Use high-quality, thin cables designed for discreet installation and consider using conduit or protective tubing to further conceal them.
If your fake security camera involves power or data transmission, route the wires carefully through walls, floors, or ceilings, ensuring they’re secured and out of sight. Use professional tools and techniques to create clean cuts and precise paths, maintaining the integrity of your structure. Once the wiring is in place, test all connections to confirm functionality while preserving the realistic appearance of your mounted dummy camera setup.
Upgrading your home or business security with fake security cameras is an effective and cost-efficient strategy. By following these simple steps on how to mount fake security cameras, from choosing the right dummy housing to finalizing with hidden wiring, you can create a realistic security presence without the high costs of professional installation. Remember, the key to successful deception lies in detail; ensure your dummy camera housing replacements look authentic and are securely installed for maximum deterrent effect.