Dummy dome cameras offer a cost-effective security solution by acting as visible deterrents for intruders. To maximize their effectiveness, mount them in high-traffic, visible locations like front doors and windows, avoiding obvious spots. Strategically place these cameras for clear lines of sight towards entries, ensuring sturdy mounting surfaces and adequate lighting. Follow a step-by-step guide to install blinking LED dummy dome cameras, testing functionality after setup. Regular maintenance, including inspections, cleaning, and battery replacements, ensures optimal performance and deterrence.
“Uncover the power of dummy dome cameras with blinking LEDs as a cost-effective security solution. This comprehensive guide explores the benefits and key features of these realistic fake cameras, ideal for deterring crime and enhancing home or business security. Learn how to strategically choose mounting locations to maximize their impact, and follow our step-by-step installation process. Additionally, discover maintenance tips to ensure optimal performance of your blinking LED dummy dome cameras, providing you with peace of mind.”
- Understanding Dummy Dome Cameras and Their Benefits
- Choosing the Right Location for Mounting Fake Security Cameras
- Installation Process: A Step-by-Step Guide to Mounting Your Dummy Cameras
- Maintenance and Tips for Optimal Performance of Your Blinking LED Dummy Dome Cameras
Understanding Dummy Dome Cameras and Their Benefits
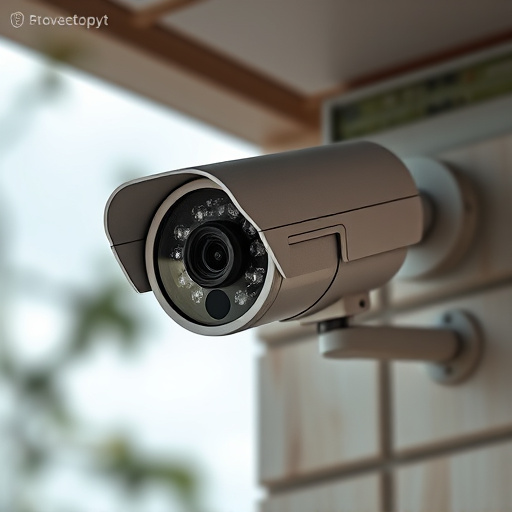
Dummy dome cameras, also known as fake security cameras, are an innovative and cost-effective solution for enhancing home or business security. These devices look like real surveillance cameras but serve as a deterrent rather than an actual recording system. By strategically placing these cameras around properties, homeowners and businesses can create the illusion of enhanced security, often discouraging potential intruders.
The benefits of using dummy dome cameras are numerous. How to Mount Fake Security Cameras is straightforward, making them accessible for DIY installation. They are ideal for high-risk areas where actual surveillance cameras might be costly or visible deterrents are needed. These cameras offer peace of mind and can act as a powerful psychological tool, convincing would-be thieves that your property is better equipped to prevent crime.
Choosing the Right Location for Mounting Fake Security Cameras
When considering how to mount fake security cameras, choosing the right location is paramount. Opt for high-traffic areas visible from various angles, mimicking real surveillance setups. Front doors, windows, and entryways are strategic choices that convey a sense of security. Avoid obvious places where genuine cameras might be expected, like directly above doors or in plain sight from nearby buildings. Instead, position your dummy dome cameras in less anticipated locations for maximum deterrence.
Consider the environment as well. Ensure the mounting surface can support the camera’s weight and provides adequate lighting to activate the blinking LED feature convincingly. Think about the view and what potential intruders would see—a clear line of sight towards entries or vulnerable areas discourages unwanted visitors while aligning with the realistic appearance of active surveillance.
Installation Process: A Step-by-Step Guide to Mounting Your Dummy Cameras
Installation Process: A Simple Guide to Mounting Your Dummy Cameras
To install your dummy dome cameras with blinking LEDs, start by selecting the ideal location for optimal visibility and deterrence. Mounting them at eye level or slightly elevated is best. Ensure the surface is clean and dry, then secure the camera body using the included hardware, usually screws or adhesive strips designed for outdoor use. Position the lens carefully to face the desired area, ensuring no obstructions block its view.
Next, attach the power cable to the camera and feed it through a drill hole (if necessary) to create a clean, discreet look. Connect the other end of the cable to a reliable power source, ideally one that offers constant power with minimal fluctuations to prevent the LED blinking from becoming erratic. Once powered up, test the camera’s functionality, including the LED blink to ensure it mimics real surveillance equipment effectively.
Maintenance and Tips for Optimal Performance of Your Blinking LED Dummy Dome Cameras
To ensure your blinking LED dummy dome cameras perform optimally, regular maintenance is key. Start by inspecting the camera for any signs of damage or wear, especially around the lens and LED lighting. Keep the camera clean using a soft, dry cloth to remove dust or debris that might affect its performance. Regularly replace the batteries, as dead or weak batteries can impact the camera’s functionality and cause the LEDs to blink erratically.
When mounting your fake security cameras, position them strategically for maximum effect. Place them in areas with good visibility, ensuring they are not easily obstructed. Use secure mounts that won’t easily be tampered with or removed. Additionally, consider the lighting conditions; bright, well-lit areas tend to enhance the camera’s authenticity. Regularly test the cameras’ functionality, including the LED blinking pattern, to ensure they remain operational and deter potential intruders effectively.
Dummy dome cameras with blinking LEDs offer a cost-effective security solution, especially as deterrents in homes and businesses. By strategically placing these fake cameras, you can significantly enhance your property’s safety while enjoying peace of mind. With proper installation and maintenance, as outlined in this guide, you’ll ensure optimal performance. Now, armed with the knowledge on how to mount fake security cameras, take control of your security and transform your space into a safer environment.